2. Installation
Listen to this tutorial -
When it comes to installation, it’s important to note that Bun is still relatively new, with version 1.0 having just been released. If you’re using Windows, you’ll need to utilise the Windows Subsystem for Linux (WSL) to get the full Bun experience. On the other hand, if you’re on a Mac or Linux, you can easily install Bun using curl or even globally with npm.
For Mac and Linux users, the installation process is straightforward. However, if you’re on Windows, I highly recommend leveraging the Windows Subsystem for Linux to ensure a smooth installation.
Now, let’s move beyond the discussion and slides and dive right into exploring what Bun has to offer.
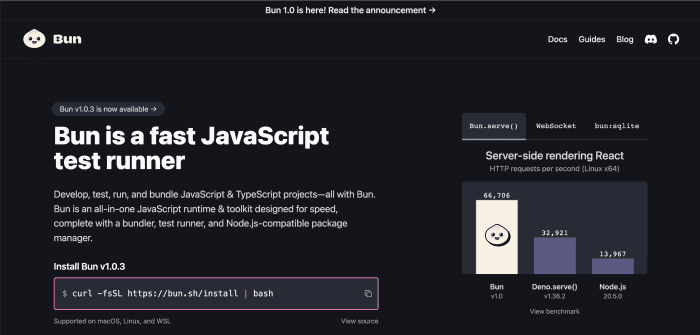
For those interested in exploring further and getting started with Bun, you can visit the official website at bun.sh. Here, you’ll find comprehensive documentation to guide you through the installation process and beyond.
If you look closely, you’ll see a convenient curl command provided on the website for installation. It’s important to note that Bun is officially supported on Mac OS, Linux, and Windows Subsystem for Linux (WSL). So, if you happen to be using Windows, the recommended approach is to utilize the Windows Subsystem for Linux to ensure a smooth installation experience. This way, you can fully harness the capabilities of Bun on your development environment.
You can run the following command to install Bun v1.0.3:
Install Bun with CURL
curl -fsSL https://bun.sh/install | bash
Indeed, there are multiple ways to install Bun, catering to various preferences and development environments. You can opt to install it globally using npm, utilise Homebrew if you’re on Mac, consider Docker for containerisation, or explore Proto as another installation option.
Install Bun with NPM
npm install -g bun # the last `npm` command you'll ever need
Install Bun with Homebrew
brew tap oven-sh/bun # for macOS and Linux
brew install bun
Install Bun with Docker
docker pull oven/bun
docker run --rm --init --ulimit memlock=-1:-1 oven/bun
In my case, you’ve chosen the curl command for installation, which is a valid and straightforward choice. It’s all about selecting the method that aligns best with your setup and workflow. So, feel free to proceed with the curl command, and let’s dive into the exciting world of Bun and what it has to offer!
Once the installation process has finished, you can verify the installed version of Bun on your machine by running the following command in your terminal:
bun --version
# Output:  1.0.3
This command will display the current version of Bun that is installed, confirming that the installation was successful. It’s a great way to ensure that you have the right version up and running as you begin your coding journey with Bun.
Now that the installation is complete, you’re all set to embark on your coding journey with Bun. Whether you’re building web applications, experimenting with JavaScript, or tackling any development project, Bun provides a versatile and efficient toolkit to help you achieve your goals. So, without further ado, let’s get started and explore the possibilities that Bun has to offer in the world of web development!
Create and Run Hello World program in bun
bun init command
To get started with Bun, you can initialise your project in a manner similar to how you would with NPM. Here are the steps you can follow:
- Run the following command in your terminal to initiate the project setup:
bun init
This command is similar to running npm init. You will be prompted to provide details such as the package name (which is typically fine as the default), the entry point file (which is set as index.ts by default), and other project-related information.
- Upon completion of the initialization, you will notice that Bun sets up your project with several files and dependencies, which include:
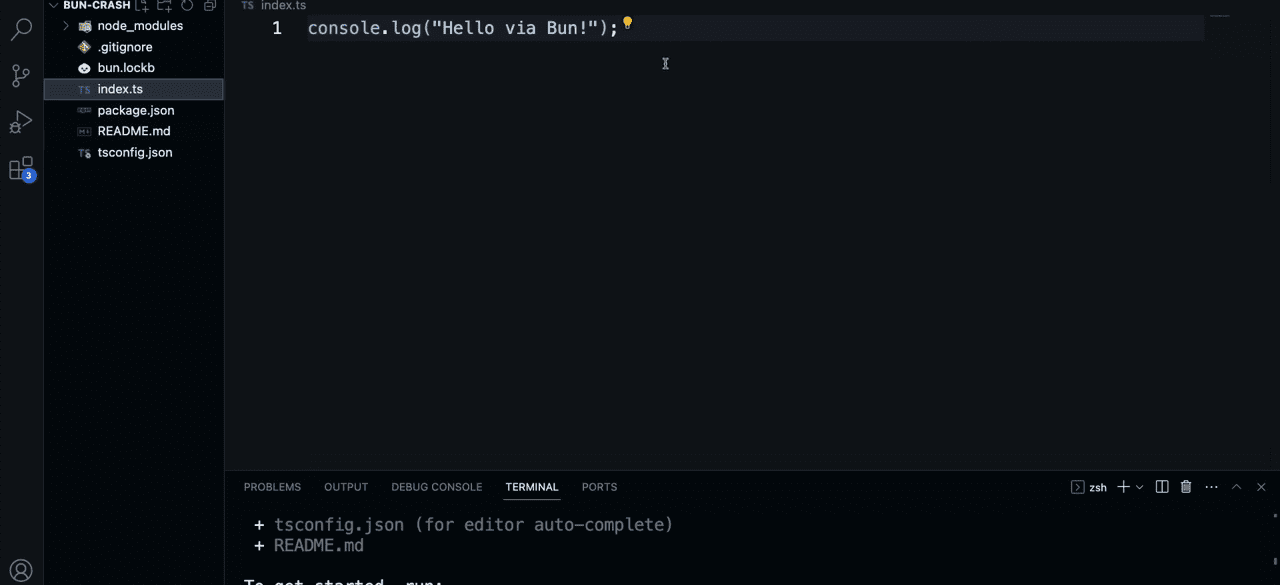
- A TypeScript configuration file (
tsconfig.json), which you can customize if needed. - The main entry point file (
index.ts) with a basicconsole.logstatement. - A Bun lock file (
bun.lock). - A
package.jsonfile for project configuration. - Dependencies, including TypeScript as a peer dependency and
@bun/typesas a dev dependency. - A
node_modulesfolder containing the necessary packages. - A
.gitignorefile to specify which files and directories to exclude from version control. - A README file that you can use to document your project.
bun run command
With your project initialised, you can now proceed to write and run your JavaScript or TypeScript code using Bun, similar to how you would with Node.js.
To run a Bun file, you can execute it using the bun command followed by the file name, like this:
bun run index.ts
This command will execute your TypeScript file, and you can observe the output in the terminal.
With these steps, you’re all set to start coding with Bun and take advantage of its features for JavaScript and TypeScript development.